---
title: "How to Install OpenClaw in 2026: Complete Setup Guide for Every Method"
description: "Step-by-step OpenClaw installation guide covering Railway one-click, DigitalOcean, Docker VPS, and local Mac setup. Real commands, security hardening, and troubleshooting included."
author: "Jahanzaib Ahmed"
date: 2026-03-24
tags: ["openclaw", "installation", "docker", "self hosted", "tutorial"]
canonical: https://www.jahanzaib.ai/blog/how-to-install-openclaw-complete-setup-guide
source: https://www.jahanzaib.ai
---
# How to Install OpenClaw in 2026: Complete Setup Guide for Every Method
OpenClaw has crossed 247,000 GitHub stars and the install question comes up every day. Most guides pick one method and leave you guessing about the others. This guide covers all four: Railway for the fastest possible start, DigitalOcean for a managed VPS, a full Docker plus Nginx plus SSL setup on any Linux server (the approach I use in production deployments), and a free local Mac setup with Ollama for offline use. Every command is tested and explained.
If you are still deciding whether OpenClaw is the right tool for your situation, read [What Is OpenClaw](https://www.jahanzaib.ai/blog/what-is-openclaw-open-source-ai-agent-explained) first. That post covers what the software actually does and who it is built for. This guide assumes you have already made that decision and just want to get it running.
Pick the section that matches your situation. If you are comparing methods and have not decided yet, start with the table below. It lays out the real tradeoffs so you can choose in 60 seconds.
## Comparing the four installation methods
Before touching a terminal or clicking any button, here is an honest side-by-side of what each approach costs, requires, and is best suited for.
| Method | Monthly Cost | Skill Required | Setup Time | Best For |
| --- | --- | --- | --- | --- |
| Railway (one click) | ~$5 | Beginner | 5 minutes | Fastest start, no server management |
| DigitalOcean 1-Click | $6 to $12 | Beginner | 10 minutes | Managed Ubuntu droplet, simple billing |
| Docker VPS (Nginx + SSL) | $4 to $8 | Intermediate | 45 minutes | Production, full control, lowest cost |
| Local Mac with Ollama | $0 | Beginner | 20 minutes | Testing, privacy, no API costs |
The Docker VPS path is what I use for client deployments (including enterprise [AI agent](https://www.jahanzaib.ai/glossary/ai-agent) rollouts you can see on the [case studies page](https://www.jahanzaib.ai/work)). It gives you the most control, the best performance per dollar, and the cleanest security posture once configured properly. Railway wins on speed and simplicity if you just want to get something running today.
## What you need before you start
Every installation method requires one thing: an API key from an AI provider. OpenClaw is the agent platform — it needs a language model to actually think and respond. You have several options:
- **Anthropic Claude** — Get a key at [console.anthropic.com](https://console.anthropic.com). Claude is the best choice for production deployments. Use `anthropic/claude-haiku-4-5` for cost-efficient agents or `anthropic/claude-sonnet-4-5` for more capable ones.
- **OpenAI** — Get a key at [platform.openai.com](https://platform.openai.com). GPT-4o works well if you already have OpenAI credits.
- **Ollama (local models)** — Free, runs entirely on your machine. Required for Method 4. Quality depends on your hardware.
For VPS methods you also need a domain name if you want HTTPS. A $10 to $15 per year domain from Namecheap or Cloudflare Registrar is enough. If you skip this step, the gateway runs over plain HTTP on an IP address, which is fine for testing but not for anything real.
## Method 1: Railway one-click deploy
Railway is a platform-as-a-service that handles the server, networking, and TLS for you. OpenClaw maintains an official Railway template that gets you a running instance in about five minutes with no command line required.
### Step 1: Deploy the template
Go to Railway and search for the OpenClaw template, or click the deploy button in the [official OpenClaw docs](https://docs.openclaw.ai/). Railway will prompt you to log in or create a free account first.
Once logged in, Railway shows you the template configuration screen. Do not click deploy yet.
### Step 2: Add persistent storage
Before deploying, add a volume. Without this your agent configuration and conversation history disappear every time the container restarts. In the Railway template editor, click "Add Volume" and mount it at `/data`. This is the most commonly skipped step and the most common cause of lost configuration.
### Step 3: Set the required environment variables
Railway needs three variables set before it will work correctly. Set these in the Variables tab before first deploy:
```bash
OPENCLAW_GATEWAY_PORT=8080
OPENCLAW_GATEWAY_TOKEN=your-long-random-secret-here
OPENCLAW_STATE_DIR=/data/.openclaw
OPENCLAW_WORKSPACE_DIR=/data/workspace
```
Generate the gateway token with a password manager or run `openssl rand -hex 32` locally. This token is the only thing protecting your OpenClaw dashboard from the public internet — treat it as an admin password.
### Step 4: Enable public networking
In Railway's Networking section, enable HTTP Proxy on port 8080. This exposes your deployment at an auto-generated Railway domain like `https://something.up.railway.app`. You can also attach a custom domain here if you have one.
### Step 5: Deploy and access the dashboard
Click Deploy. Railway builds and launches the container, usually in about 90 seconds. Once it shows "Active", navigate to `https://your-railway-domain.up.railway.app/openclaw` and paste your gateway token into the Settings screen.
Add your AI provider API key under Settings → AI Providers and you are ready to add channels.
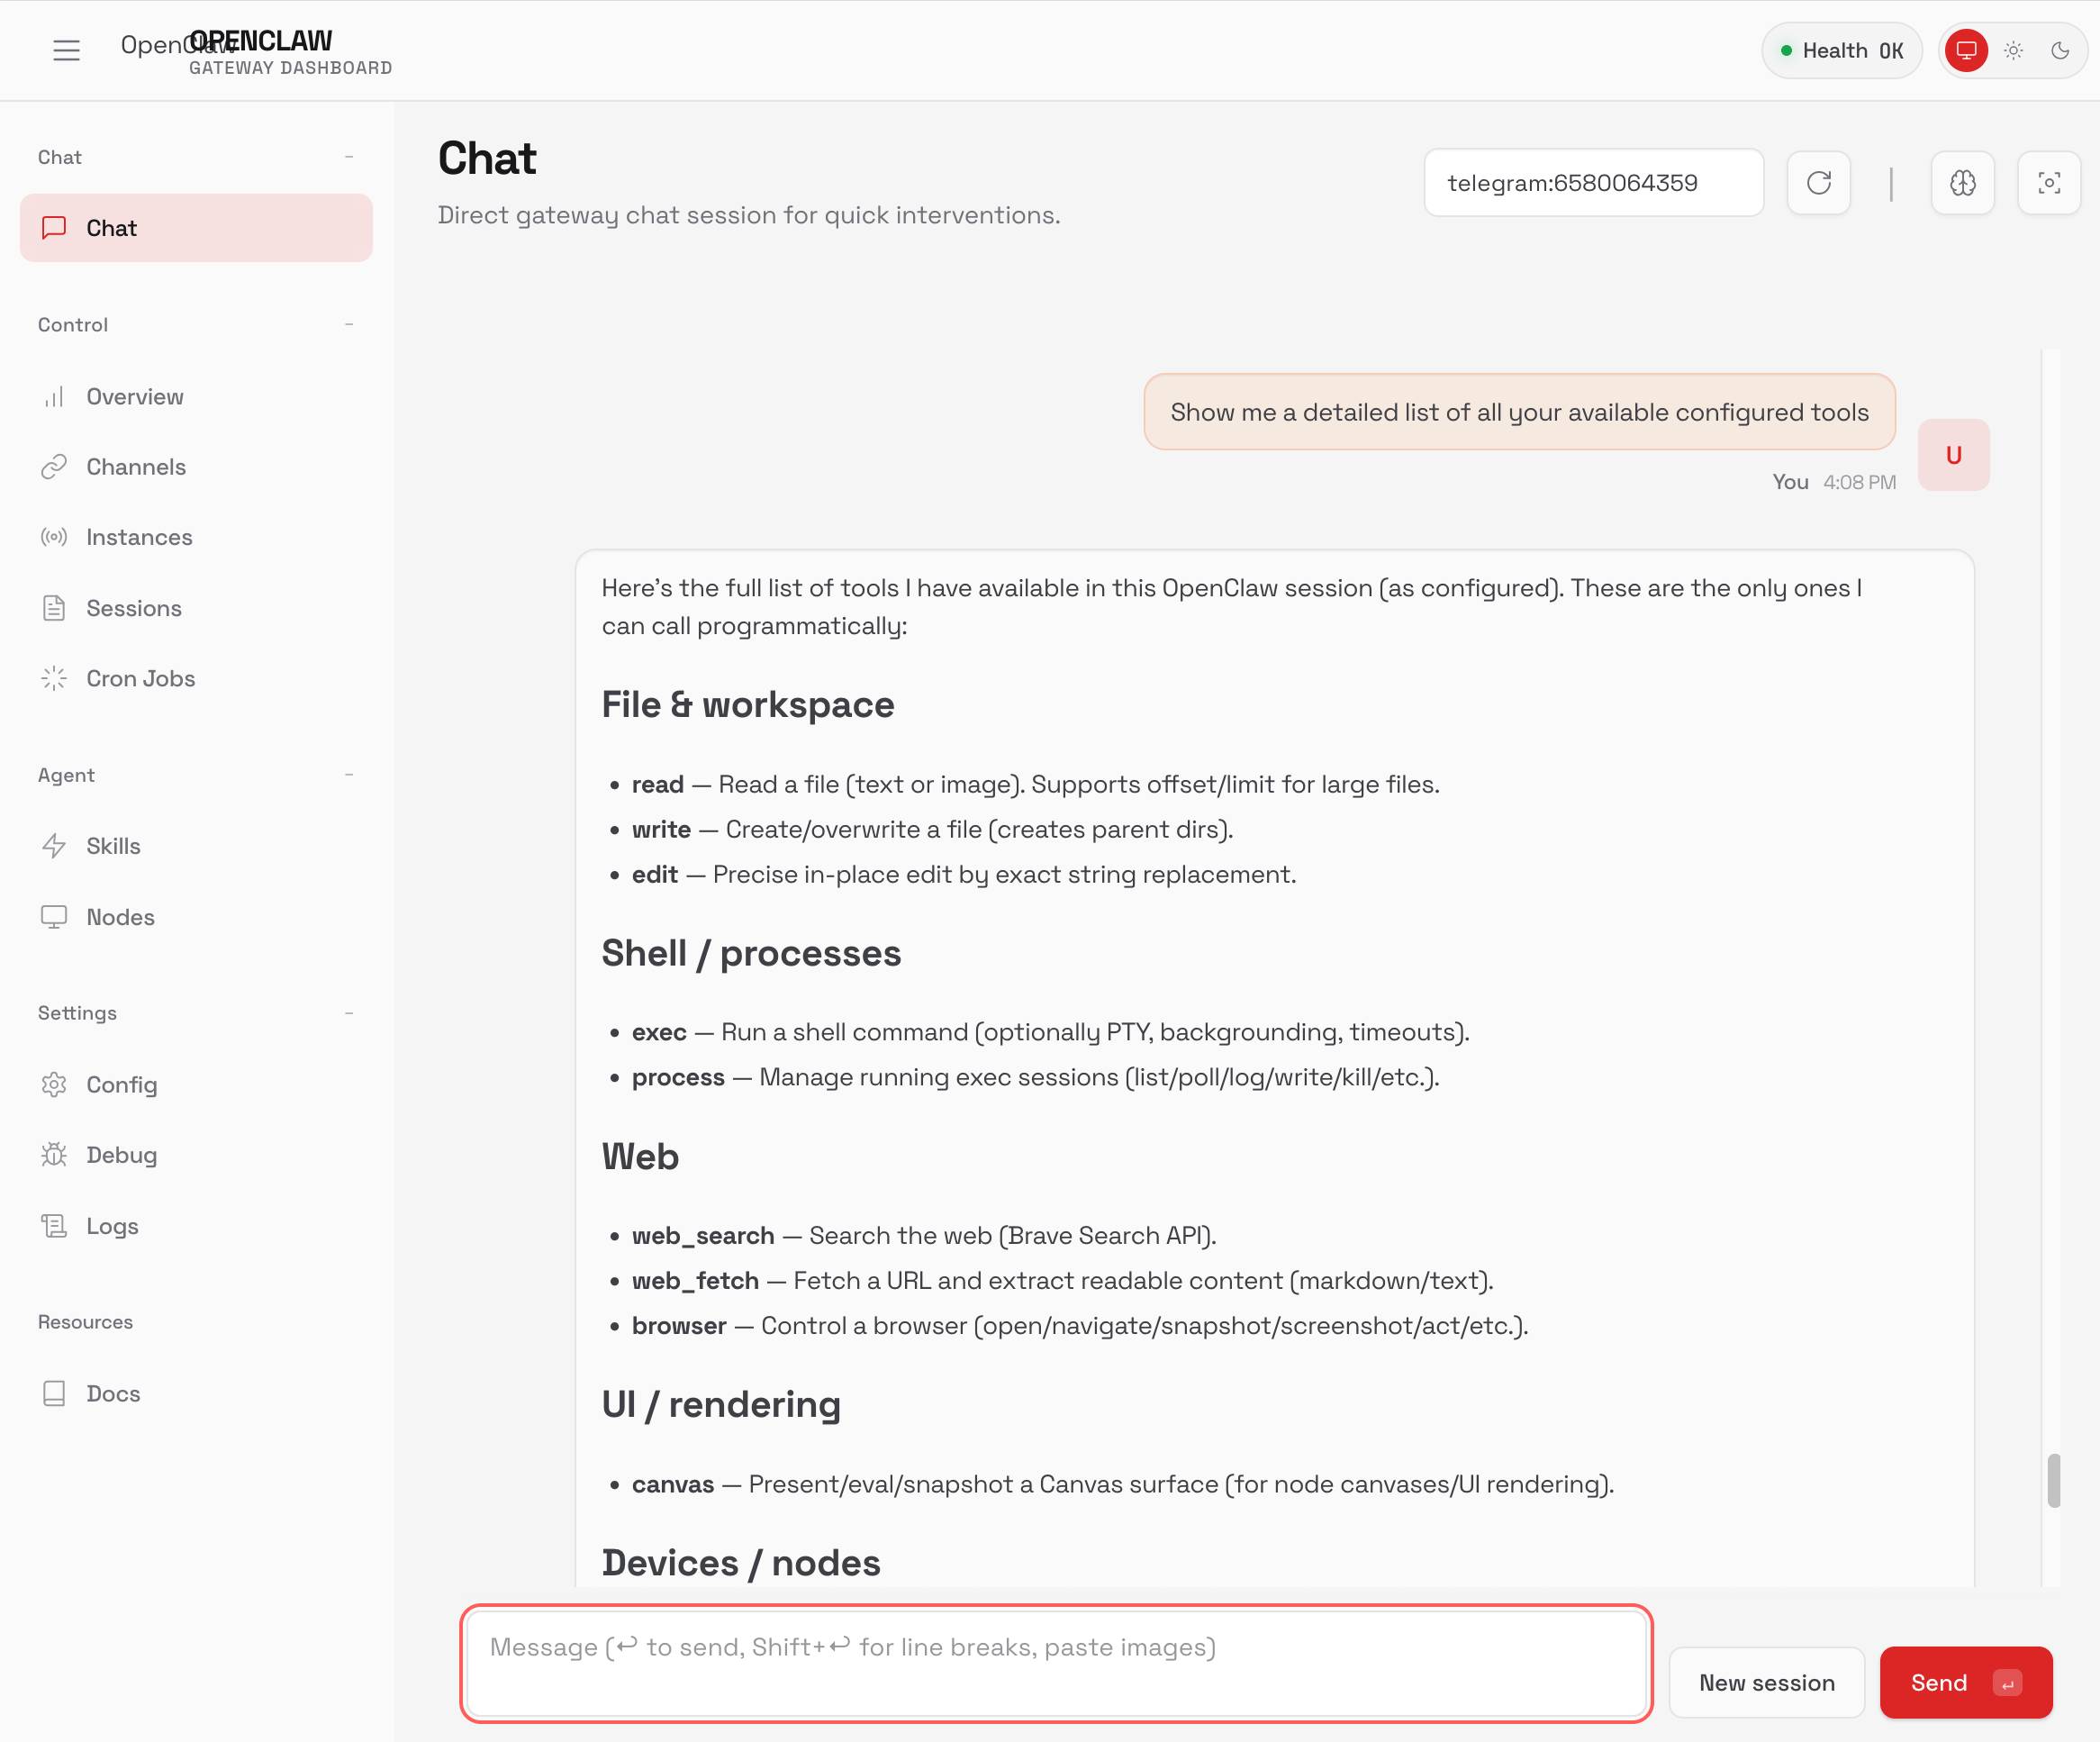
_OpenClaw web UI — source: Simon Willison_
## Method 2: DigitalOcean 1-Click Marketplace
DigitalOcean offers a pre-configured OpenClaw Droplet in their Marketplace. It provisions a hardened Ubuntu server with Docker and OpenClaw already installed. Good option if you prefer a traditional VPS with a simple monthly bill rather than Railway's usage-based pricing.
### Step 1: Create the Droplet
In the DigitalOcean control panel, go to Marketplace and search for OpenClaw. Choose the Droplet size — the basic $6 per month option (1 vCPU, 1GB RAM) is enough for personal use. The $12 per month (2 vCPU, 2GB RAM) option is better if you are running multiple channels or expect steady message volume. Choose the datacenter region closest to your users and add your SSH key before creating.
### Step 2: SSH in and complete the setup wizard
Once the Droplet is provisioned (usually takes 90 seconds), SSH in as root using the IP shown in your DigitalOcean dashboard:
```bash
ssh root@your-droplet-ip
```
The first login triggers the OpenClaw setup wizard automatically. It will ask for your AI provider API key, generate a gateway token, and write everything to the configuration file at `/root/.openclaw/openclaw.json`.
### Step 3: Access the dashboard
The wizard prints your dashboard URL at the end. It looks like `http://your-droplet-ip:18789`. Open it in a browser, paste the gateway token into Settings, and add your AI provider credentials.
For production use, you should put Nginx in front of this and add SSL — the same steps covered in Method 3 apply here. The DigitalOcean Droplet already has Nginx available, so you just need to configure it.
## Method 3: Full VPS with Docker, Nginx, and SSL
This is the recommended approach for anyone running OpenClaw beyond personal testing. You get full control over the server, the cheapest possible hosting cost (Hetzner CX22 runs OpenClaw comfortably at around €4.35 per month), and a setup that follows proper security practices from the start.
The whole process takes about 45 minutes the first time. I will explain what each command does, not just paste blocks and hope for the best.
### What you need
- A fresh Ubuntu 24.04 VPS with at least 2GB RAM (4GB recommended)
- Root SSH access to that server
- A domain name with its DNS pointed at the server's IP address
- An AI provider API key
### Step 1: Initial server setup
Log into your fresh server as root. The first thing to do is create a non-root user — running OpenClaw as root is a security risk because any compromise of the agent gives an attacker root access to your entire server.
```bash
adduser openclaw
usermod -aG sudo openclaw
su - openclaw
```
Now configure the firewall. UFW (Uncomplicated Firewall) is available by default on Ubuntu. These rules allow only SSH, HTTP, and HTTPS traffic — everything else is blocked.
```bash
sudo ufw default deny incoming
sudo ufw default allow outgoing
sudo ufw allow 22/tcp
sudo ufw limit 22/tcp
sudo ufw allow 80/tcp
sudo ufw allow 443/tcp
sudo ufw enable
```
The `ufw limit 22/tcp` rule enables [rate limiting](https://www.jahanzaib.ai/glossary/rate-limiting) on SSH, which blocks basic brute-force attempts automatically.
Next, install fail2ban. This watches your SSH logs and bans IPs that fail authentication too many times:
```bash
sudo apt update && sudo apt install -y fail2ban
sudo systemctl enable fail2ban
sudo systemctl start fail2ban
```
### Step 2: Install Docker Engine
Do not use the Docker version from Ubuntu's default package repository — it is often outdated. Install from Docker's official repository instead.
```bash
sudo apt install -y ca-certificates curl gnupg
sudo install -m 0755 -d /etc/apt/keyrings
curl -fsSL https://download.docker.com/linux/ubuntu/gpg | sudo gpg --dearmor -o /etc/apt/keyrings/docker.gpg
sudo chmod a+r /etc/apt/keyrings/docker.gpg
echo \
"deb [arch=$(dpkg --print-architecture) signed-by=/etc/apt/keyrings/docker.gpg] \
https://download.docker.com/linux/ubuntu \
$(. /etc/os-release && echo "$VERSION_CODENAME") stable" | \
sudo tee /etc/apt/sources.list.d/docker.list > /dev/null
sudo apt update
sudo apt install -y docker-ce docker-ce-cli containerd.io docker-buildx-plugin docker-compose-plugin
```
Add your non-root user to the docker group so you can run Docker commands without sudo:
```bash
sudo usermod -aG docker openclaw
newgrp docker
```
### Step 3: Create the docker-compose.yml
Create a project directory and the Compose file. Notice the ports section — this is critical. The gateway binds to `127.0.0.1:18789`, not `0.0.0.0:18789`. Binding to loopback means the gateway is only reachable from the server itself, not from the public internet. Nginx will handle incoming traffic and proxy it to this local port.
```bash
mkdir -p ~/openclaw-docker && cd ~/openclaw-docker
```
Create the `docker-compose.yml` file with the following content:
```yaml
services:
openclaw:
image: ghcr.io/openclaw/openclaw:latest
container_name: openclaw
restart: unless-stopped
ports:
- "127.0.0.1:18789:18789"
volumes:
- ./config:/home/node/.openclaw
- ./workspace:/home/node/.openclaw/workspace
env_file:
- .env
```
If the ports section shows `0.0.0.0:18789` instead of `127.0.0.1:18789`, your dashboard is publicly accessible without any authentication. Fix it before proceeding.
Now create the `.env` file with your credentials:
```bash
OPENCLAW_GATEWAY_TOKEN=$(openssl rand -hex 32)
echo "OPENCLAW_GATEWAY_TOKEN=$OPENCLAW_GATEWAY_TOKEN" >> .env
echo "ANTHROPIC_API_KEY=your-anthropic-api-key-here" >> .env
```
Set strict permissions on the env file so other users on the server cannot read your API keys:
```bash
chmod 600 .env
chmod 700 ~/openclaw-docker
```
### Step 4: Configure Nginx as a reverse proxy
Install Nginx first:
```bash
sudo apt install -y nginx
```
Create the site configuration file. Replace `openclaw.yourdomain.com` with your actual domain:
```nginx
upstream openclaw_backend {
server 127.0.0.1:18789;
}
server {
listen 80;
server_name openclaw.yourdomain.com;
location / {
return 301 https://$server_name$request_uri;
}
}
server {
listen 443 ssl;
http2 on;
server_name openclaw.yourdomain.com;
ssl_certificate /etc/letsencrypt/live/openclaw.yourdomain.com/fullchain.pem;
ssl_certificate_key /etc/letsencrypt/live/openclaw.yourdomain.com/privkey.pem;
ssl_protocols TLSv1.2 TLSv1.3;
ssl_prefer_server_ciphers off;
location / {
proxy_pass http://openclaw_backend;
proxy_http_version 1.1;
proxy_set_header Upgrade $http_upgrade;
proxy_set_header Connection "upgrade";
proxy_set_header Host $host;
proxy_set_header X-Real-IP $remote_addr;
proxy_set_header X-Forwarded-For $proxy_add_x_forwarded_for;
proxy_set_header X-Forwarded-Proto $scheme;
proxy_read_timeout 86400;
}
}
```
The `Upgrade` and `Connection: upgrade` headers are not optional. OpenClaw uses WebSockets for real-time communication — without these headers the dashboard will load but messages will not stream properly.
Save this file to `/etc/nginx/sites-available/openclaw`, then enable it:
```bash
sudo ln -s /etc/nginx/sites-available/openclaw /etc/nginx/sites-enabled/
sudo nginx -t
sudo systemctl reload nginx
```
### Step 5: Get SSL with Let's Encrypt
Make sure your domain's DNS A record is already pointing to your server's IP before running Certbot. If DNS has not propagated yet, the certificate request will fail.
```bash
sudo apt install -y certbot python3-certbot-nginx
sudo certbot --nginx -d openclaw.yourdomain.com
```
Certbot will ask for your email address, agree to terms on your behalf, and automatically update the Nginx config with the certificate paths. It also installs a systemd timer that renews the certificate automatically before it expires.
Test that automatic renewal works:
```bash
sudo certbot renew --dry-run
```
### Step 6: Start OpenClaw
Go back to your project directory and start the container:
```bash
cd ~/openclaw-docker
docker compose up -d
```
Check that it started correctly and is listening on the right address:
```bash
docker compose ps
docker compose logs -f --tail 50
```
You should see the gateway bound to `127.0.0.1:18789` in the logs. Visit `https://openclaw.yourdomain.com` in a browser, paste your gateway token from the `.env` file into Settings, and add your AI provider API key.
### Step 7: Set up automated backups
Your OpenClaw configuration, channel credentials, and conversation history all live in the `~/openclaw-docker/config` directory. Back this up daily. Here is a simple cron-based backup that keeps the last 7 days:
```bash
crontab -e
```
Add this line to your crontab (adjust the backup destination path as needed):
```bash
0 3 * * * tar -czf ~/backups/openclaw-$(date +%Y%m%d).tar.gz ~/openclaw-docker/config && find ~/backups -name 'openclaw-*.tar.gz' -mtime +7 -delete
```
Create the backups directory first with `mkdir -p ~/backups`. For production setups, push these backups to an S3 bucket or similar object storage instead of keeping them on the same server.
## Method 4: Local Mac with Ollama (free, no API costs)
Running OpenClaw locally on your Mac with Ollama lets you test the platform with zero ongoing cost and complete privacy — no data leaves your machine. The tradeoff is that local models are less capable than cloud APIs, and your agent is only available when your Mac is on and not sleeping.
### Requirements
- macOS 12 or later
- At least 8GB RAM (16GB recommended for comfortable performance)
- Apple Silicon (M1 or later) gives significantly faster inference than Intel
### Step 1: Install Ollama
Download Ollama from [ollama.com](https://ollama.com) or install via Homebrew:
```bash
brew install ollama
```
Pull a capable model. Llama 3.2 3B is fast and works well for basic agents. Mistral 7B is stronger but slower:
```bash
ollama pull llama3.2
ollama serve
```
Leave `ollama serve` running in a separate terminal tab, or set it to start automatically with launchd (step 3 covers this).
### Step 2: Install OpenClaw
OpenClaw requires Node.js 22 LTS (version 22.16 or later) or Node 24. Check your version first:
```bash
node --version
```
If you need to install or upgrade Node, use nvm or Homebrew:
```bash
brew install node@22
```
Install OpenClaw globally and run the onboarding wizard:
```bash
npm install -g openclaw@latest
openclaw onboard
```
When the wizard asks for an AI provider, choose Ollama and enter `http://localhost:11434` as the base URL. Select `llama3.2` (or whichever model you pulled) as the model.
### Step 3: Set up launchd for autostart
To have OpenClaw start automatically when your Mac boots, create a launchd plist file. This is the macOS equivalent of a systemd service on Linux.
Create the file at `~/Library/LaunchAgents/ai.openclaw.gateway.plist`:
```xml
Label
ai.openclaw.gateway
ProgramArguments
/usr/local/bin/openclaw
gateway
RunAtLoad
KeepAlive
StandardOutPath
/tmp/openclaw.log
StandardErrorPath
/tmp/openclaw-error.log
```
Load it with launchctl:
```bash
launchctl load ~/Library/LaunchAgents/ai.openclaw.gateway.plist
```
The dashboard is available at `http://127.0.0.1:18789` after the service starts. You can open it with `openclaw dashboard`.
## openclaw.json configuration reference
After any installation method, the main configuration file lives at `~/.openclaw/openclaw.json` (or the path you set in `OPENCLAW_STATE_DIR`). Here are the most important settings you will want to configure once you are running.
```json
{
"gateway": {
"bind": "loopback",
"auth": {
"mode": "token",
"token": "your-gateway-token-here"
},
"controlUi": {
"allowedOrigins": ["https://openclaw.yourdomain.com"]
}
},
"agents": {
"defaults": {
"sandbox": { "mode": "all" }
}
},
"tools": {
"exec": {
"security": "deny"
}
},
"channels": {
"whatsapp": {
"dmPolicy": "allowlist",
"allowFrom": ["+15555550123"],
"groups": {
"*": { "requireMention": true }
}
}
},
"messages": {
"groupChat": {
"mentionPatterns": ["@openclaw"]
}
}
}
```
Key settings explained:
- **gateway.bind: "loopback"** — Restricts the gateway to listen on `127.0.0.1` only. Never change this to `0.0.0.0` on a public server unless you have explicit authentication protecting the port.
- **gateway.auth.token** — The bearer token required to access the dashboard and API. Generate a strong one with `openssl rand -hex 32`.
- **gateway.controlUi.allowedOrigins** — Allowlist of domains that can load the control UI. Set this to your domain, not a wildcard.
- **agents.defaults.sandbox.mode: "all"** — Runs agent tool execution in isolated Docker containers, preventing agent code from affecting the host system. Requires the Docker socket to be available.
- **tools.exec.security: "deny"** — Prevents agents from running arbitrary shell commands by default. You can whitelist specific commands as needed.
- **channels.whatsapp.dmPolicy: "allowlist"** — Only phone numbers in `allowFrom` can message the bot directly. Options are `allowlist`, `pairing` (new users get a code), or `open` (anyone can message).
- **channels.whatsapp.groups.\*.requireMention** — In group chats, the bot only responds when explicitly mentioned (e.g. @openclaw). Prevents the agent from processing every message in a busy group.
## Channel setup quick start
### WhatsApp
WhatsApp uses the WhatsApp Web protocol (via Baileys). You link your phone number or a dedicated WhatsApp number — the gateway maintains the session. Run the login command to get a QR code:
```bash
openclaw channels login --channel whatsapp
```
Or in Docker:
```bash
docker compose run --rm openclaw-cli channels login --channel whatsapp
```
Scan the QR code with your WhatsApp mobile app under Settings → Linked Devices. Once paired, the gateway maintains the session automatically. Add your phone number to `channels.whatsapp.allowFrom` in the config so you can actually message it.
For a dedicated number (recommended for business use), get a separate SIM or use a virtual number service and create a fresh WhatsApp account on that number. This keeps your personal WhatsApp completely separate.
### Telegram
Telegram requires creating a bot through @BotFather. Open Telegram, start a conversation with @BotFather, and send `/newbot`. Follow the prompts to name your bot and get the bot token (format: `123456789:ABCdef...`).
Add the token to your config:
```json
{
"channels": {
"telegram": {
"enabled": true,
"botToken": "123456789:ABCdef...",
"dmPolicy": "pairing",
"groups": {
"*": { "requireMention": true }
}
}
}
}
```
Start the gateway and approve the first message pairing request:
```bash
openclaw gateway
openclaw pairing list telegram
openclaw pairing approve telegram
```

Pairing codes expire after one hour. If you miss the window, the next message from that Telegram account generates a new code.

### Slack

Slack integration uses Socket Mode, which means OpenClaw connects outbound to Slack rather than requiring a public webhook URL. This works even without a domain name and is easier to set up behind a firewall.

Create a Slack app at [api.slack.com/apps](https://api.slack.com/apps) and enable Socket Mode. You need two tokens:

-   App Token (format: `xapp-...`) — requires `connections:write` permission
-   Bot Token (format: `xoxb-...`) — obtained after installing the app to your workspace

Enable these event subscriptions in your app settings: `app_mention`, `message.channels`, `message.groups`, `message.im`, and `message.mpim`. Also enable the App Home Messages Tab so users can DM the bot directly.

Add to your config:

```json
{
  "channels": {
    "slack": {
      "enabled": true,
      "mode": "socket",
      "appToken": "xapp-...",
      "botToken": "xoxb-..."
    }
  }
}
```

## Security essentials

OpenClaw can send emails, run shell commands, access files, make API calls, and control a browser. A misconfigured instance is not just annoying — it can be actively dangerous. These are the non-negotiable security basics.

### Bind to loopback, always

The gateway should never listen on `0.0.0.0` on a public server. Set `gateway.bind: "loopback"` in your config and verify with:

```bash
sudo ss -tlnp | grep 18789
```

The output should show `127.0.0.1:18789`. If it shows `0.0.0.0:18789`, your gateway is exposed to the internet without authentication.

### Set a strong gateway token

The gateway token is the only authentication layer protecting your dashboard. Use at least 32 random bytes:

```bash
openssl rand -hex 32
```

Store it only in your `.env` file (permissions: `600`) or a proper secrets manager. Do not commit it to version control.

### Restrict exec mode

Shell command execution is the highest-risk capability. Start with it disabled and only enable it for specific, allowlisted commands:

```json
{
  "tools": {
    "exec": {
      "security": "deny"
    }
  }
}
```

To enable specific commands later, use `"security": "allowlist"` and list exactly which commands are permitted.

### Lock down message channels

Never set `dmPolicy: "open"` unless you specifically want any random person who discovers your bot to be able to talk to it and trigger agent actions. Use `allowlist` for known users or `pairing` for controlled access to new users.

### Run the security audit

OpenClaw has a built-in security audit command that checks for common misconfigurations:

```bash
openclaw security audit --deep
```

Run this after initial setup and after any major configuration change. The `--fix` flag can auto-correct some issues, but review each fix before applying it.

### File permissions for the config directory

Your `~/.openclaw` directory contains API keys, channel credentials, and session transcripts. Lock it down:

```bash
chmod 700 ~/.openclaw
chmod 600 ~/.openclaw/openclaw.json
```

## Troubleshooting

### Gateway not starting

First check the logs:

```bash
# Native install
openclaw logs --follow

# Docker install
docker compose logs -f --tail 100
```

Common causes: missing or invalid API key in the environment, port 18789 already in use by another process, or Node.js version below the minimum (22.16). Run `openclaw doctor` for a diagnosis.

### Nginx 502 Bad Gateway

This means Nginx is running but cannot reach the OpenClaw gateway. Check that the container is actually up and listening on the right port:

```bash
docker compose ps
curl -I http://127.0.0.1:18789
```

If the container is running but the curl fails, check whether the `ports` section in `docker-compose.yml` correctly maps `127.0.0.1:18789:18789`. A common mistake is mapping to `18789:18789` without the IP prefix, which still binds to loopback on most systems but can behave differently depending on Docker's bridge network configuration.

### WhatsApp keeps disconnecting

WhatsApp Web sessions expire if the gateway goes offline for more than a few days, or if you open WhatsApp Web on another browser while the gateway is running. The session is stored in `~/.openclaw/credentials/whatsapp/` — if this directory is missing or corrupt, you need to re-pair by running the login command again. On VPS setups, make sure this directory is in your Docker volume mount so it persists across container restarts.

### Telegram bot not responding

The most common issue is the bot being added to a group with privacy mode enabled. By default, Telegram bots in groups only see messages that start with `/` or mention the bot directly. Either disable privacy mode in BotFather with `/setprivacy`, make the bot a group admin, or set `requireMention: true` in your config so the bot only fires when explicitly mentioned.

### Dashboard loads but messages do not appear

This is almost always a WebSocket issue. Check that your Nginx config includes the `Upgrade` and `Connection: upgrade` proxy headers. Without them, the long-lived WebSocket connection that streams messages to the dashboard cannot establish.

### Container runs out of memory during build

If you are building the Docker image locally (rather than using the pre-built image from ghcr.io), the Node.js compile step requires at least 2GB of RAM. On a 1GB VPS, this will fail with an OOM kill. Either upgrade to a larger server or use the pre-built image:

```bash
export OPENCLAW_IMAGE="ghcr.io/openclaw/openclaw:latest"
./scripts/docker/setup.sh
```

### Let's Encrypt certificate renewal fails

The most common cause is Nginx not running when the renewal tries to complete. Certbot uses a standalone challenge that needs port 80 free, or it uses the Nginx plugin which requires Nginx to be running. Check with:

```bash
sudo certbot renew --dry-run
sudo systemctl status nginx
```

### Pairing code expired

Pairing codes on WhatsApp and Telegram expire after one hour and are capped at three pending requests per channel. If you have stale pending requests, clear them with:

```bash
openclaw pairing list whatsapp
openclaw pairing reject whatsapp
```

### Cannot connect to dashboard after closing SSH tunnel

If you access your VPS dashboard through an SSH tunnel (the most secure approach for local-only setups), you need the tunnel active to reach the dashboard. Re-establish it with:

```bash
ssh -L 18789:localhost:18789 user@your-vps.com -N
```

Then visit `http://localhost:18789` in your browser.

## Frequently asked questions

What is the minimum server size I need to run OpenClaw?

For a single-user setup with one or two channels, 1GB RAM and 1 vCPU is enough for daily use. Once you add multiple channels, enable [sandboxing](https://www.jahanzaib.ai/glossary/sandboxing), or use browser automation tools, 2GB RAM becomes the practical minimum. For teams or high-volume automations, start with 4GB RAM. DigitalOcean's $6 per month droplet (1GB) is fine to start; upgrade if you hit memory pressure.

Can I run OpenClaw on a shared hosting plan?

No. OpenClaw requires a persistent process and optionally Docker — neither is available on typical shared hosting. You need a VPS with KVM virtualization or a platform like Railway that handles containers for you. Shared hosting plans running on cPanel or Plesk will not work.

Is the Railway method secure for production use?

Railway handles TLS, DDoS protection, and infrastructure security for you. The main risk is the gateway token — if someone gets that, they have full control of your agent. Use a strong token (32+ random hex characters), enable the allowlist on your channels so only your number can message the bot, and restrict exec mode in your config. Railway is fine for production personal and small-team use. For enterprise deployments with strict compliance requirements, the self-hosted Docker VPS path gives you more control over the network boundary.

How much does running OpenClaw cost per month including AI API costs?

The server is $4 to $12 per month depending on provider and size. AI costs depend entirely on usage. With Claude Haiku 4.5 (the most cost-efficient option), a moderately active personal agent handling 50 to 100 messages per day typically costs $1 to $3 per month in API fees. Heavier use with longer context windows or more capable models runs $10 to $30 per month. The local Ollama method eliminates API costs entirely at the price of slower, less capable responses.

Can I use OpenClaw with multiple WhatsApp numbers?

Yes. OpenClaw supports multi-account configuration for WhatsApp. Each account gets its own credentials stored under `~/.openclaw/credentials/whatsapp//`. Run the login command with an account flag to pair additional numbers: `openclaw channels login --channel whatsapp --account work`. Each account can have its own allowlist and policy settings in the config.

Does OpenClaw work on Windows?

The npm global install works on Windows via WSL2 (Windows Subsystem for Linux). Native Windows installation is not officially supported as of March 2026. The Docker method works on Windows with Docker Desktop installed, but all the shell commands in this guide assume a Linux environment — run them inside WSL2 for best results. For production use, a Linux VPS is strongly recommended over Windows.

How do I update OpenClaw to the latest version?

For the Docker method: `docker compose pull && docker compose up -d && docker image prune -f`. For the npm install method: `npm update -g openclaw`. Railway auto-deploys when the OpenClaw team pushes a new release. DigitalOcean Marketplace images do not auto-update — SSH in and run the Docker update command manually. Always check the GitHub release notes before updating in production; occasionally there are breaking changes to the config format.

What happens to my data if I switch from Railway to a self-hosted VPS?

OpenClaw has a built-in backup and restore command. On Railway, open the shell and run `openclaw backup export --output /data/backup.tar.gz` to create an archive of your config and workspace. Then copy that archive to your new server and run `openclaw backup import --input ./backup.tar.gz` after initial setup. Channel credentials like WhatsApp sessions do not always transfer cleanly — you may need to re-pair your messaging apps after migration.

How do I stop OpenClaw from responding to everyone on WhatsApp?

Set `dmPolicy: "allowlist"` and add only your phone number to `allowFrom` in your WhatsApp channel config. For groups, set `requireMention: true` so the agent only fires when someone uses the mention pattern (like @openclaw). These two settings together mean the agent only responds to you in DMs and only when explicitly mentioned in groups.

Can OpenClaw run multiple AI models at once?

Yes. You can configure different agents with different model providers and route tasks accordingly. For example, use a fast, cheap model like Claude Haiku for quick replies and a more capable model for complex research tasks. This is configured at the agent level in `openclaw.json` under `agents`. Multi-agent routing with isolated sessions is one of OpenClaw's core features — agents can hand off tasks to each other based on capability or workload.

## Ready to deploy?

You now have everything you need to get OpenClaw running, secured, and connected to your channels. The Railway method gets you live in five minutes. The Docker VPS path gives you a production-grade setup you can trust with real workloads.

Where most teams get stuck is not installation — it is knowing what to do with OpenClaw once it is running. What automations to build first. How to design multi-agent workflows that actually save time instead of creating new maintenance headaches. How to connect it to the internal tools and data sources that make it genuinely useful.

That is where I work with clients. If you are building AI agent infrastructure for a business and want someone who has done this across ecommerce, logistics, legal tech, and B2B SaaS, take a look at the [AI agent services page](https://www.jahanzaib.ai/agents) or browse the [case studies](https://www.jahanzaib.ai/work) to see what these deployments look like in practice.

---

Canonical HTML version: https://www.jahanzaib.ai/blog/how-to-install-openclaw-complete-setup-guide